In previous notes we have explored how to integrate an IoT device (ESP8266) with an MQTT broker. The next step on this journey is to actually make such a device controllable from Home Assistant via the MQTT connection.
The work in this note will be based on the Home Assistant MQTT integration documentation.
There are three ways that devices can be “added” to the MQTT integration
Only the first option would be relatively “automatic” or “plug and play”, in the sense that one could point the device at the MQTT broker and (presumably) have it automatically “appear” in Home Assistant. The latter two options it appears would require either manually setting the configuration YAML in Home Assistant or manually entering some stuff in the UI. Additionally the “discovery” approach is taken by the Tasmota integration which is what I’m used to and I find works pretty well.
Hence we’ll try and set up a device here by MQTT discovery.
From the linked documentation page, these are the rough steps.
Step 1 - we’ll need to send discovery messages on a specific discovery topic
Step 2 - work out the right format for the discovery message
Step 3 - we’ll need to do that at the right time
There appear to be two options to send the discovery messages at the right time, which are following “birth” and “will” messages from Home Assistant, or publishing those discovery messages with the “retained” flag. Because we have explored subscribing to topics already in the previous notes and because there seem to be more disadvantages to the latter approach, in this note we’ll take the former approach.
Hence
Step 3a - we’ll need to send a discovery message when the device connects to the MQTT broker
Step 3b - we’ll need to send a discovery message when Home Assistant sends a “birth” message (announces that it’s online)
The discovery topic format is documented here https://www.home-assistant.io/integrations/mqtt/#discovery-topic
as
<discovery_prefix>/<component>/[<node_id>/]<object_id>/config.
<discovery_prefix> is a configuration item in the
MQTT integration in Home Assistant, which defaults to
homeassistant. I have not changed this in my Home
Assistant, hence that’s the right value to use.
For <component> we’ll use device
since we’ll be using the “newer” device discovery rather than component
discovery.
Per the documentation, since we will assign our devices a
unique_id, we can omit the <node_id>
level.
Per the documentation, since we will assign our devices a
unique_id, the <object_id> will be set
to that unique_id.
So for the case where the unique_id is
e.g. e1e080f341364ceeb6038a050ed7dd60 the discovery topic
would be
homeassistant/device/e1e080f341364ceeb6038a050ed7dd60/config.
This is the major unknown in this note, everything else is frankly pretty easy to figure out with the code given in previous notes.
Unfortunately, the documentation is not (at least in my opinion) particularly well organised, so here’s what I’m able to piece together.
The discovery payload is, unsurprisingly, a JSON.
For device discovery, the JSON has the following top level keys
device / dev *origin / ocommand_topicstate_topicqosencodingcomponents / cmpsdevice and origin, maps**, are
required.
command_topic, string, should be given for a device
which accepts commands, such as a switch or a light.
state_topic, string, should be given for a device which
can publish states to Home Assistant such as a switch (on/off) or a
sensor.
qos, integer, optional, I assume it sets the quality of
service for messages sent to the device? This is apparently not
documented on the page.
encoding, string, optional, appears to tell Home
Assistant the string encoding expected in messages from and to the
device, which defaults to UTF-8. UTF-8 “covers” the entire range of
ASCII encoding, outside of which our device will not step, so we can
ignore this key completed.
components is a map, with a key per “component” in the
device, each with an map value. A component is an independent “part” in
a device - for example a single switch might just have one switch
component, a temperature and humidity sensor might have two components
i.e. two sensors with different units of measurement,
* where abbreviated
keys are supported, I’ll give full_key /
abbreviated_key
** JSON objects, but I’ll call them maps because that comes more naturally to me
deviceTo find the full documentation for the device map I had to dive into the YAML configuration documentation for the specific MQTT integrations, for example buttons or switches.
I’m pretty sure the device entry is the same for all of the different integrations, but I don’t feel like comparing all 20 or however many there are…
Everything in this map is apparently optional, which is a bit
surprising considering the device key is required in the
device discovery payload?
So, I’m just going to start with whatever is suggested in the example discovery payloads, under the assumption that nothing here (except probably the ids) is that important for our non-commercial device anyway. These fields are
identifiers/ids, string or list of
strings, id or sequence of ids which uniquely identify the devicename, string, name of the device (presumably, human
friendly?)manufacturer / mf, string, self evident (I
think we’ll omit this one)model / mdl, string, also self evident (I
think we’ll omit this one)sw_version / sw, string, firmware
versionserial_number / sn, string, self
evidenthw_version / hw, string, hardware
versionFor identifiers we’ll just use the unique id for the
device, which we’ll take as a UUID. We’ll use that as
serial_number too.
For name we worked in previous notes on a switch, so
let’s call it “Test Switch”.
For sw_version and hw_version I’m sure a
real project would follow some well defined versioning scheme such as
semver. For simple learning projects like this, I prefer a simpler
approach, so we’ll just use an integer number, setting these both to
(string) “1”.
Assuming UUID c1d9bca9ddfc4803be31d7920d57f91e then
would give us a device map
{
    "hw_version": "1",
    "identifiers": "c1d9bca9ddfc4803be31d7920d57f91e",
    "name": "Test Switch",
    "serial_number": "c1d9bca9ddfc4803be31d7920d57f91e",
    "sw_version": "1"
}originThe purpose of this field it seems is only to add context to the logs generated by Home Assistant relating to updates to the device, but it’s required for the device discovery payload, so add it we must. There are three keys
name, string, the documentation says “the name of the
application that is the origin of the discovered MQTT item”, though we
won’t have a separate application from the device in our case?sw_version / sw, string, software version
of this applicationsupport_url / url, string, URL for support
for the applicationOnly name is required so that’s all we’ll give, and
we’ll make it match the device name, Test Switch.
Hence our origin payload will be super simple
{
    "name": "Test Switch"
}
command_topic and
state_topicThese fields tell Home Assistant where it should publish commands to be consumed by the device and on which topic the device will publish updates about its state.
Luckily we have chosen a switch example to work on, which means we will need to set both.
Obviously these need to be unique so multiple devices don’t interfere with one another.
We could go super simple here, something like
command_topic ->
<<UUID>>/commandstate_topic ->
<<UUID>>/stateHowever I would generally go with something a bit more structured and
that provides a bit more context - remember in the previous note we saw
the Tasmota topics like stat/tasmota_DEVICE_SHORT_ID/RESULT
and cmnd/tasmota_DEVICE_SHORT_ID/Power1.
We might want to include the application name or the manufacturer name (if we had one) or the model name, but since we only have a device name for now, let’s use that to “namespace” our topics.
command_topic ->
test_switch/command/<<UUID>>state_topic ->
test_switch/state/<<UUID>>componentsAfter reading through twice, I can’t see where this is explicitly spelled out, but I think each value in the map under components must be a configuration from the lists in this section.
One of the examples in the device discovery section
{
  "p": "sensor",
  "device_class":"temperature",
  "unit_of_measurement":"°C",
  "value_template":"{{ value_json.temperature}}",
  "unique_id":"temp01ae_t"
}
matches perfectly the sensor configuration documentation entry.
So, for our switch, we’ll need to work from the corresponding switch configuration documentation entry.
There is a quite an array of configuration entries for a switch, the full example from the documentation is
mqtt:
  - switch:
      unique_id: bedroom_switch
      name: "Bedroom Switch"
      state_topic: "home/bedroom/switch1"
      command_topic: "home/bedroom/switch1/set"
      availability:
        - topic: "home/bedroom/switch1/available"
      payload_on: "ON"
      payload_off: "OFF"
      state_on: "ON"
      state_off: "OFF"
      optimistic: false
      qos: 0
      retain: true
Luckily, almost all of this is optional, and some of it (e.g. the
command_topic and switch_topic) will be
provided at the device level when using device discovery.
Actually there is one missing configuration item from that YAML,
which is only supported for discovery messages, and which is documented
for the device
discovery payload. That is platform / p.
The platform is the component type, the same as the key against which
you’ll find the configuration map in the YAML, in this case
switch. This must be provided for discovery, so we can
start with this JSON.
{
    "platform": "switch"
}
unique_id is also documented as being required when
using device discovery. We’ll use a new UUID for this.
{
    "platform": "switch",
    "unique_id": "<<SOME NEW UUID>>"
}
Everything else is optional and I think we can do without it in the
first instance - I won’t give a justification for each, because there
are quite a lot, except to say that the defaults are given where
required & reasonable and for name which is already
defined at the device level.
Generating thus a fresh UUID for the component, we have
{
    "platform": "switch",
    "unique_id": "a2f9f04b8ea04993b7e0d71cb53162d6"
}Bringing the previous sections all together
{
    "command_topic": "test_switch/command/c1d9bca9ddfc4803be31d7920d57f91e",
    "components": {
        "a2f9f04b8ea04993b7e0d71cb53162d6": {
            "platform": "switch",
            "unique_id": "a2f9f04b8ea04993b7e0d71cb53162d6"
        }
    },
    "device": {
        "hw_version": "1",
        "identifiers": "c1d9bca9ddfc4803be31d7920d57f91e",
        "name": "Test Switch",
        "serial_number": "c1d9bca9ddfc4803be31d7920d57f91e",
        "sw_version": "1"
    },
    "origin": {
        "name": "Test Switch"
    },
    "state_topic": "test_switch/state/c1d9bca9ddfc4803be31d7920d57f91e"
}Using the mqttx CLI we can directly send this payload to our MQTT broker attached to Home Assistant to see if Home Assistant accepts it.
mqttx pub \
-t 'homeassistant/device/c1d9bca9ddfc4803be31d7920d57f91e/config' \
-m '
 {
    "command_topic": "test_switch/command/c1d9bca9ddfc4803be31d7920d57f91e",
    "components": {
        "a2f9f04b8ea04993b7e0d71cb53162d6": {
            "platform": "switch",
            "unique_id": "a2f9f04b8ea04993b7e0d71cb53162d6"
        }
    },
    "device": {
        "hw_version": "1",
        "identifiers": "c1d9bca9ddfc4803be31d7920d57f91e",
        "name": "Test Switch",
        "serial_number": "c1d9bca9ddfc4803be31d7920d57f91e",
        "sw_version": "1"
    },
    "origin": {
        "name": "Test Switch"
    },
    "state_topic": "test_switch/state/c1d9bca9ddfc4803be31d7920d57f91e"
}
 ' \
-h homeassistant.lan \
-p 1883 \
-u $MQTT_USER \
-P $MQTT_PASSWORD
Recall that MQTT_USER and MQTT_PASSWORD are
the username and password set up in Home Assistant for connections to
the MQTT broker, in my case I’ll be using a user I created for tasmota
devices.
Amazingly, this worked on the first try! The switch appeared under the MQTT Integrations entry.
[TODO: ADD SCREENSHOT]
It is available to add to e.g. dashboards.
[TODO: ADD SCREENSHOT]
If we listen on all topics and attempt to toggle the switch
mqttx sub -t '#' -h homeassistant.lan -p 1883 -u $MQTT_USER -P $MQTT_PASSWORDthen we’ll see the commands going through
...
topic: test_switch/command/c1d9bca9ddfc4803be31d7920d57f91e, qos: 0
OFF
...
on exactly the topic we configured above.
Finally, as we have done in the previous Tasmota related note, we can send state updates on the state topic and we will see the state in Home Assistant change from unknown to on/off.
mqttx pub \
-t 'test_switch/state/c1d9bca9ddfc4803be31d7920d57f91e' \
-m 'ON' \
-h homeassistant.lan \
-p 1883 \
-u $MQTT_USER \
-P $MQTT_PASSWORD
[TODO: ADD SCREENSHOT]
mqttx pub \
-t 'test_switch/state/c1d9bca9ddfc4803be31d7920d57f91e' \
-m 'OFF' \
-h homeassistant.lan \
-p 1883 \
-u $MQTT_USER \
-P $MQTT_PASSWORD
[TODO: ADD SCREENSHOT]
Then, to double check we’re not creating a mess forever, I restarted Home Assistant to check that the test switch device disappears, which I believe it should since the discovery message was not published as retained. Alas, it did not! Luckily it can be manually deleted from the MQTT integration.
[TODO: ADD SCREENSHOT]
I checked that resending the discovery message makes the device reappear under the MQTT integration too.
Based on our previous MQTT notes, this should be quite straightforward. We’ll start with a template based on the code we developed before. I’ve added comments in to refresh our memories about what the various parts do, and I’ve inserted TODOs where we’ll be implementing new or additional functionality.
#include <ESP8266WiFi.h>
#include <PubSubClient.h>

// Enter your WiFi credentials here
const char* connect_to_ssid = "your-wifi-ssid-here";
const char* connect_to_password = "your-wifi-password-here";

// Enter your mqtt connection details & mqtt user credentials here
const char* mqtt_host = "your-mqtt-host-here";
const uint16_t mqtt_port = 1833;
const char* mqtt_user = "your-mqtt-user-here";
const char* mqtt_password = "your-mqtt-password-here";
// Note this has been updated to match the device's id
const char* mqtt_client_id = "c1d9bca9ddfc4803be31d7920d57f91e";

WiFiClient espClient;
PubSubClient client(espClient);

// Buffer for outgoing messages, and its size including null terminator
const uint16_t maximum_outgoing_message_length = 20;
char outgoing_message[maximum_outgoing_message_length];

// Buffer for incoming messages, and its size including null terminator
const uint16_t maximum_incoming_message_length = 20;
char incoming_message[maximum_incoming_message_length];

// When a message is received, its length including null terminator is stored here
volatile uint8_t stored_message_length = 0;

// Invoked when a message is received on a topic that we're subscribed to.
// Stores the message in incoming_message and the size of that message
// in stored_message_length. If the received message is larger than
// the maximum size of the incoming message buffer, the message is truncated to fit.
void callback(char* topic, byte* payload, unsigned int length) {
  unsigned int truncated_length = maximum_incoming_message_length - 1;
  if (length < truncated_length) {
    truncated_length = length;
  }
  for (uint8_t i=0; i<truncated_length; i++) {
    incoming_message[i] = (char)payload[i];
  }
  incoming_message[truncated_length] = '\0';
  stored_message_length = truncated_length;
  Serial.print("Topic ");
  Serial.print(topic);
  Serial.print(" received '");
  Serial.print(incoming_message);
  Serial.print("' length ");
  Serial.print(stored_message_length);
  Serial.println("");
}

// Retries connecting to the MQTT broker until
// the MQTT client indicates that it is connected
void ensure_mqtt_connected() {
  while (!client.connected()) {
    delay(250);
    Serial.print("Reconnecting to MQTT at ");
    Serial.print(mqtt_host);
    Serial.print(":");
    Serial.println(mqtt_port);
    client.setServer(mqtt_host, mqtt_port);
    bool connected = client.connect(mqtt_client_id, mqtt_user, mqtt_password);
    Serial.print("MQTT connected? ");
    Serial.print(connected);
    Serial.print(" Code ");
    Serial.println(client.state());
    client.setCallback(callback);
    // TODO: set up subscription to correct topic(s)
    bool subscribed = client.subscribe("TODO");
    Serial.print("MQTT subscribed? ");
    Serial.println(subscribed);
  }
}

// Set up the serial output and wifi connection
void setup() {
  Serial.begin(115200);
  Serial.println("");
  Serial.print("Connecting to ");
  Serial.println(connect_to_ssid);
  WiFi.mode(WIFI_STA);
  WiFi.begin(connect_to_ssid, connect_to_password);
  while (WiFi.status() != WL_CONNECTED) {
    delay(1000);
    Serial.print(".");
  }
  Serial.println("");
  Serial.println("WiFi connected");
  Serial.print("IP address: ");
  Serial.println(WiFi.localIP());

  ensure_mqtt_connected();

  // TODO: send discovery message
}

void loop() {
  ensure_mqtt_connected();

  // Receive messages on subscribed topics
  client.loop();

  // TODO: echo state changes
}
The first TODO is to send the discovery message on connect. From our previous MQTT notes, sending a message looks like this.
  if (stored_message_length > 0) {
    for (uint8_t i=0; i<stored_message_length; i++) {
      outgoing_message[i] = incoming_message[i];
    }
    outgoing_message[stored_message_length] = '\0';
    Serial.print("About to send message: ");
    Serial.println(outgoing_message);
    bool published = client.publish("state/device/test", outgoing_message);
    Serial.print("Successfully published? ");
    Serial.println(published);
    stored_message_length = 0;
  }
We’re going to be sending different types of messages (discovery and state), plus we’re going to be doing that from various different points in the code, so we’re going to want first to move this into a reusable function.
// publish to mqtt on given topic a message containing given content.
// content must be null terminated.
void send_mqtt_message(const char* topic, const char* content) {
  Serial.print("About to send message: ");
  Serial.println(content);
  bool published = client.publish(topic, content);
  Serial.print("Successfully published? ");
  Serial.println(published);
}
We should then define the discovery message in the top matter. This
is dense and hard to read, I’ve de-prettified (or compacted) the JSON
with jq -c .
const char* discovery_message = "{\"command_topic\":\"test_switch/command/c1d9bca9ddfc4803be31d7920d57f91e\",\"components\":{\"a2f9f04b8ea04993b7e0d71cb53162d6\":{\"platform\":\"switch\",\"unique_id\":\"a2f9f04b8ea04993b7e0d71cb53162d6\"}},\"device\":{\"hw_version\":\"1\",\"identifiers\":\"c1d9bca9ddfc4803be31d7920d57f91e\",\"name\":\"Test Switch\",\"serial_number\":\"c1d9bca9ddfc4803be31d7920d57f91e\",\"sw_version\":\"1\"},\"origin\":{\"name\":\"Test Switch\"},\"state_topic\":\"test_switch/state/c1d9bca9ddfc4803be31d7920d57f91e\"}";Let’s define the discovery topic similarly.
const char* discovery_topic = "homeassistant/device/c1d9bca9ddfc4803be31d7920d57f91e/config";Now we can put these pieces together in the setup code
to send the discovery message.
// Set up the serial output and wifi connection
void setup() {
  // ...

  send_mqtt_message(discovery_topic, discovery_message);
}
First ensuring that the Test Switch device is removed from the MQTT integration in Home Assistant, then uploading this code and running it on the ESP8266, we will see the expected serial output
Connecting to your-wifi-ssid
....
WiFi connected
IP address: 10.10.10.207
Reconnecting to MQTT at homeassistant.lan:1883
MQTT connected? 1 Code 0
MQTT subscribed? 1
About to send message: {"command_topic":"test_switch/command/c1d9bca9ddfc4803be31d7920d57f91e","components":{"a2f9f04b8ea04993b7e0d71cb53162d6":{"platform":"switch","unique_id":"a2f9f04b8ea04993b7e0d71cb53162d6"}},"device":{"hw_version":"1","identifiers":"c1d9bca9ddfc4803be31d7920d57f91e","name":"Test Switch","serial_number":"c1d9bca9ddfc4803be31d7920d57f91e","sw_version":"1"},"origin":{"name":"Test Switch"},"state_topic":"test_switch/state/c1d9bca9ddfc4803be31d7920d57f91e"}
Successfully published? 1
and the Test Switch device will appear in the MQTT integration
exactly as it did before when publishing with mqttx.
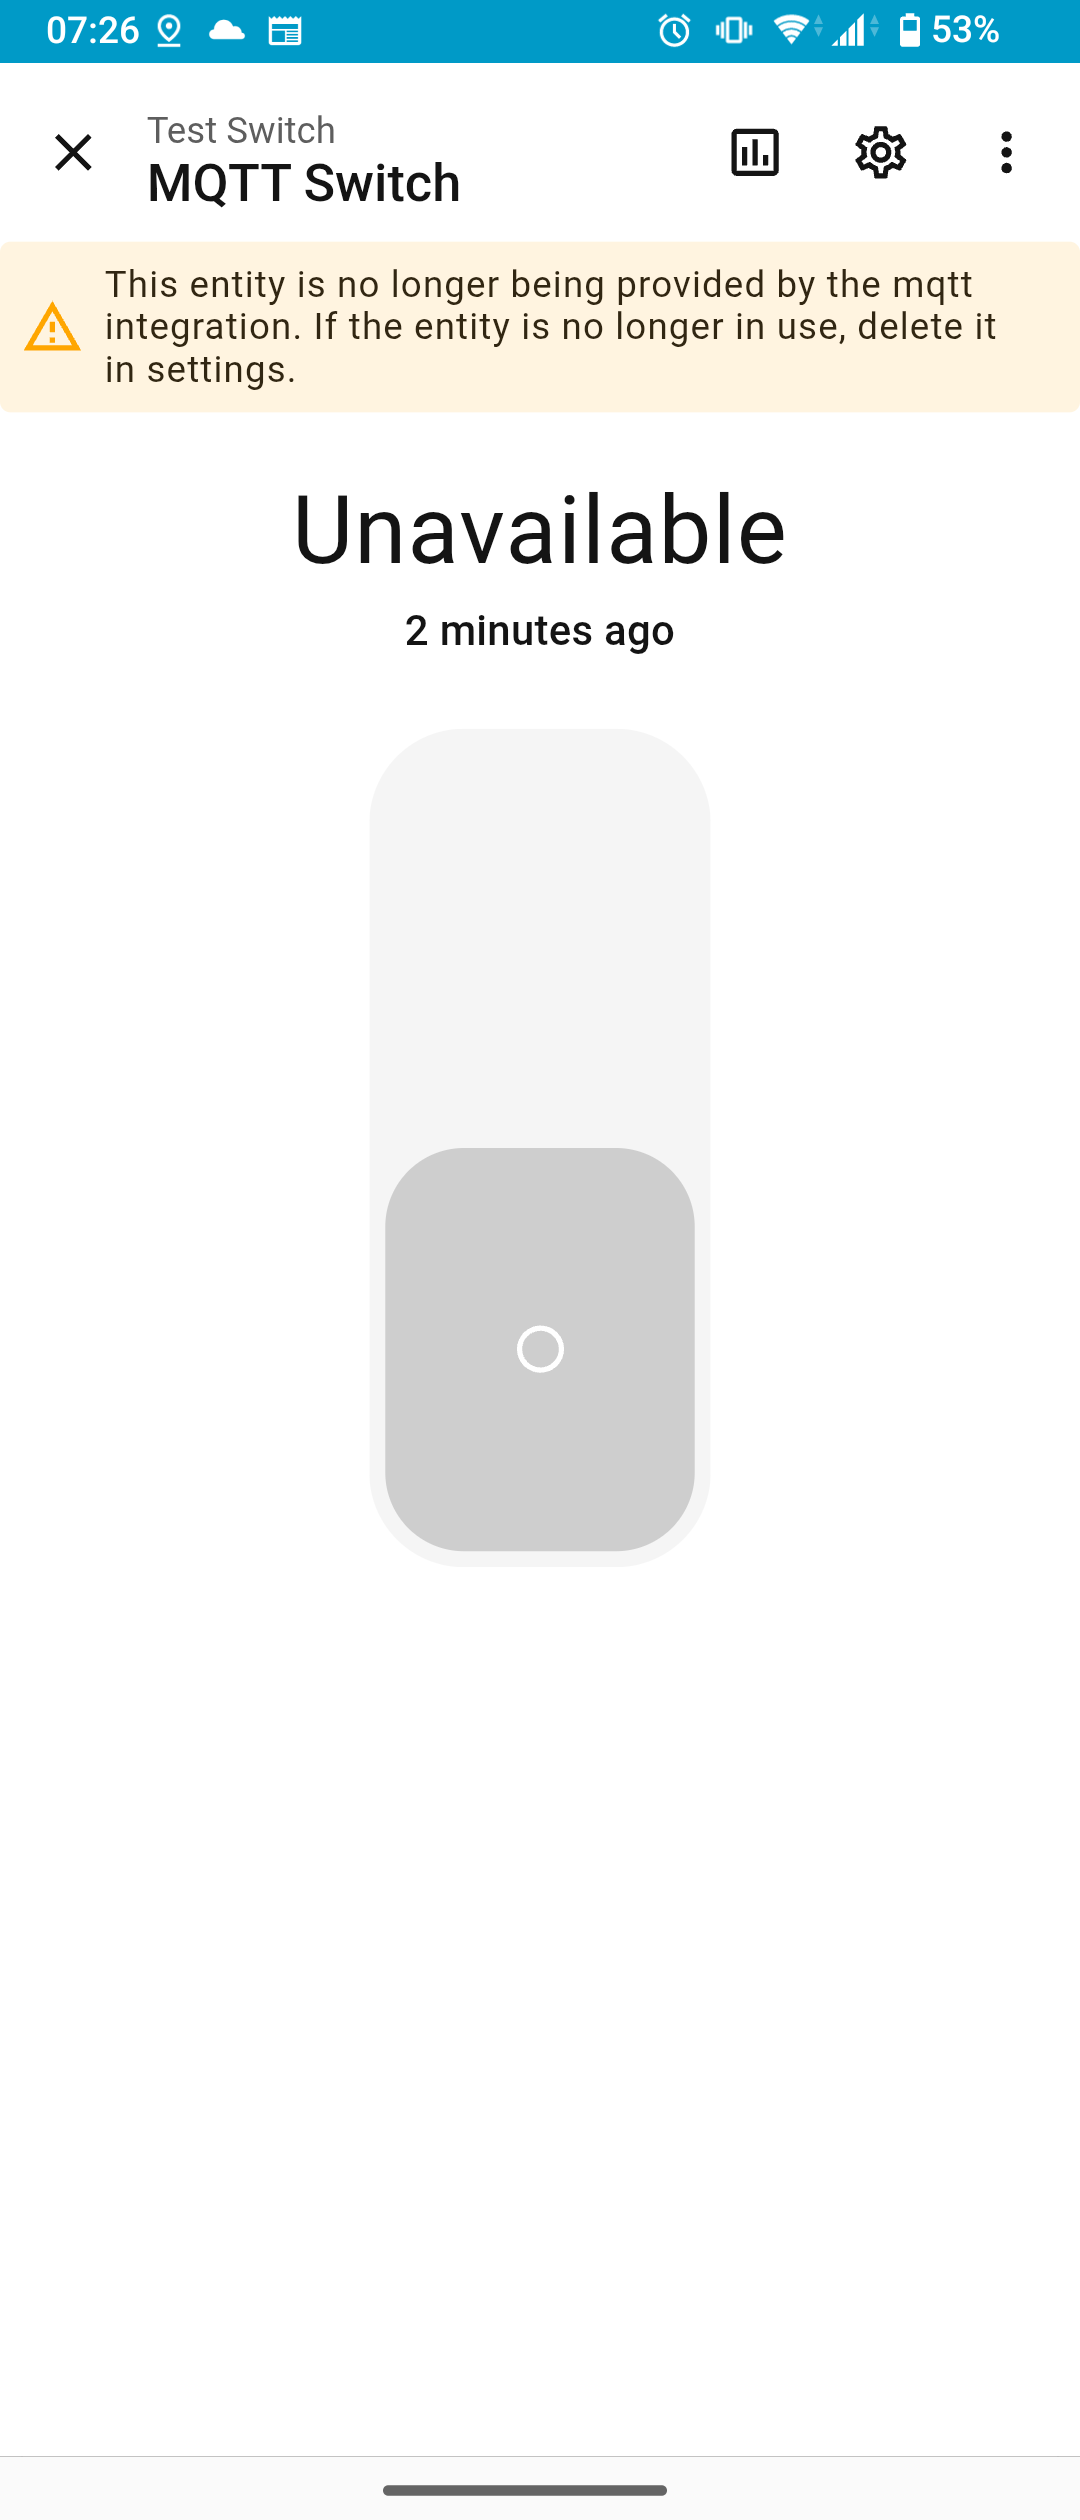
I find the expected behaviour of MQTT integration devices on restart (I think that’s the right documentation section) quite unclear. The documentation suggests that the devices added via the MQTT integration should be “unavailable” after a restart until the discovery message has been received again.
Indeed after restarting Home Assistant this is what we see
And then, after restarting the ESP8266 and letting it send the discovery message again, the device seems to become available again (but in unknown state, which we’ll fix later)

So, exactly as the linked documentation section describes, we will need a way to re-send the discovery message when Home Assistant is restarted. The most conventional way suggested to handle this situation is to listen for Home Assistant’s Online/Offline messages and re-send the discovery message on the former.
First of all, let’s see if we can capture offline/online messages
with mqttx.
mqttx sub -t '#' -h homeassistant.lan -p 1883 -u $MQTT_USER -P $MQTT_PASSWORDShortly after telling Home Assistant to restart, we see
...

topic: homeassistant/status, qos: 0
offline
Then after all of the “Starting Bluetooth …”, “Starting MQTT …”, etc… messages have passed in the Home Assistant app, we see
...

topic: homeassistant/status, qos: 0
online
Hence we’ll need to subscribe to the
homeassistant/status topic and listen for the message which
says simply online.
Looking forward, we know for this switch device that we will also at some point need to subscribe to the command channel so that Home Assistant can control the state of the switch. This means we will need to subscribe to multiple topics, which is something we have not done before in the previous notes. The pub sub client documentation page seems to suggest that we can call subscribe on the MQTT client multiple times to subscribe to multiple topics. So let’s move the subscription method calls into our own function together with our handy serial logging.
// subscribe the MQTT client to the given topic
void subscribe_mqtt_topic(const char* topic) {
    bool subscribed = client.subscribe(topic);
    Serial.print("MQTT subscribed? ");
    Serial.println(subscribed);
}

// Retries connecting to the MQTT broker until
// the MQTT client indicates that it is connected
void ensure_mqtt_connected() {
  while (!client.connected()) {
    // ...
    subscribe_mqtt_topic("homeassistant/status");
    // TODO: subscribe to command topic
  }
}
The callback we currently have set up just prints the message and the topic to serial, so we can first upload our updated code and restart Home Asssistant again to test we’re receiving those status messages. We’ll this printed in the serial monitor
Topic homeassistant/status received 'offline' length 7
Topic homeassistant/status received 'online' length 6
indicating that we are receiving those status messages correctly.
// Invoked when a message is received on a topic that we're subscribed to.
// Stores the message in incoming_message and the size of that message
// in stored_message_length. If the received message is larger than
// the maximum size of the incoming message buffer, the message is truncated to fit.
void callback(char* topic, byte* payload, unsigned int length) {
  unsigned int truncated_length = maximum_incoming_message_length - 1;
  if (length < truncated_length) {
    truncated_length = length;
  }
  for (uint8_t i = 0; i < truncated_length; i++) {
    incoming_message[i] = (char)payload[i];
  }
  incoming_message[truncated_length] = '\0';
  stored_message_length = truncated_length;
  Serial.print("Topic ");
  Serial.print(topic);
  Serial.print(" received '");
  Serial.print(incoming_message);
  Serial.print("' length ");
  Serial.print(stored_message_length);
  Serial.println("");
}
Keeping in mind that we will need to handle messages on multiple topics in the future and that messages on different topics will be handled in different ways, we’ll reshape the callback function in preparation.
// Maximum length of a string we might pass to length_of.
// Since this is used to calculate the length of topic name strings,
// this is set by the largest topic name we expect to deal with,
// which in this program is the command topic.
const unsigned int maximum_topic_length = 53;

// Calculates the length of a string, which means char* must be null terminated.
// For safety we apply a maximum length, which will be returned if the end of
// the string is not found within the first maximum length characters.
unsigned int length_of(const char* s) {
  for (unsigned int i = 0; i < maximum_topic_length; i++) {
    if (s[i] == '\0') {
      return i + 1;
    }
  }
  return maximum_topic_length;
}

// Returns true if lengths and all characters in s1 and s2 are equal, else false
bool strings_are_equal(
  const char* s1,
  const unsigned int l1,
  const char* s2,
  const unsigned int l2
) {
  if (l1 != l2) {
    return false;
  }
  for (int i = 0; i < l1; i++) {
    if (s1[i] != s2[i]) {
      return false;
    }
  }
  return true;
}

// For debug/development, prints the stored received message to serial.
// Since it uses the global incoming_message and stored_message_length,
// if will accurately reflect whether the incoming message was truncated.
void echo_received_message(const char* topic) {
  Serial.print("Topic ");
  Serial.print(topic);
  Serial.print(" received '");
  Serial.print(incoming_message);
  Serial.print("' length ");
  Serial.print(stored_message_length);
  Serial.println("");
}

// Send a discovery message when Home Assistant is online
void handle_homeassistant_status_message() {
  // TODO
}

// Invokes the appropriate handler for the message depending upon the topic
void dispatch_received_message(const char* topic) {
  if (
    strings_are_equal(
      topic,
      length_of(topic),
      "homeassistant/status",
      21
    )
  ) {
    handle_homeassistant_status_message();
    return;
  }
  // TODO: handle other message types of interest
}

// Invoked when a message is received on a topic that we're subscribed to.
// Stores the message in incoming_message and the size of that message
// in stored_message_length. If the received message is larger than
// the maximum size of the incoming message buffer, the message is truncated to fit.
void callback(char* topic, byte* payload, unsigned int length) {
  unsigned int truncated_length = maximum_incoming_message_length - 1;
  if (length < truncated_length) {
    truncated_length = length;
  }
  for (uint8_t i=0; i<truncated_length; i++) {
    incoming_message[i] = (char)payload[i];
  }
  incoming_message[truncated_length] = '\0';
  stored_message_length = truncated_length;
  echo_received_message(topic);
  dispatch_received_message(topic);
}
Quite a bit was moved around and added there, so to summarise
We have created a little mess here, for example the homeassistant/status string is hardcoded twice in our code, and the magic number length of this string. We’ll tidy this all up later at the end of the note.
Now to implement the handler for messages received on the homeassistant/status topic. Our instinct might be “we only need to send the discovery message when Home Assistant comes back online, so let’s start with an if to check the message content”. However, there’s no reason we can’t send a message when Home Assistant goes offline - it will do no harm - it just won’t be received by Home Assistant so will actually do nothing. We can avoid the if completely then, and just always send the discovery message when we see any message on homeassistant/status.
// Send a discovery message when Home Assistant is online
// (and offline, actually!)
void handle_homeassistant_status_message() {
  send_mqtt_message(discovery_topic, discovery_message);
}
Yes, thanks to moving the message sending to a function, it’s now that easy!
We now have a complete slice of functionality, i.e. sending discovery
messages when Home Assistant’s on/offline status changes, making this a
good place to stop and run some tests. We should upload this code to the
ESP8266 and restart Home Assistant, listening with mqttx on
all topics to see what messages are sent.
From mqttx
...

topic: homeassistant/status, qos: 0
offline

topic: homeassistant/device/c1d9bca9ddfc4803be31d7920d57f91e/config, qos: 0
{"command_topic":"test_switch/command/c1d9bca9ddfc4803be31d7920d57f91e","components":{"a2f9f04b8ea04993b7e0d71cb53162d6":{"platform":"switch","unique_id":"a2f9f04b8ea04993b7e0d71cb53162d6"}},"device":{"hw_version":"1","identifiers":"c1d9bca9ddfc4803be31d7920d57f91e","name":"Test Switch","serial_number":"c1d9bca9ddfc4803be31d7920d57f91e","sw_version":"1"},"origin":{"name":"Test Switch"},"state_topic":"test_switch/state/c1d9bca9ddfc4803be31d7920d57f91e"}

...

topic: homeassistant/status, qos: 0
online

topic: homeassistant/device/c1d9bca9ddfc4803be31d7920d57f91e/config, qos: 0
{"command_topic":"test_switch/command/c1d9bca9ddfc4803be31d7920d57f91e","components":{"a2f9f04b8ea04993b7e0d71cb53162d6":{"platform":"switch","unique_id":"a2f9f04b8ea04993b7e0d71cb53162d6"}},"device":{"hw_version":"1","identifiers":"c1d9bca9ddfc4803be31d7920d57f91e","name":"Test Switch","serial_number":"c1d9bca9ddfc4803be31d7920d57f91e","sw_version":"1"},"origin":{"name":"Test Switch"},"state_topic":"test_switch/state/c1d9bca9ddfc4803be31d7920d57f91e"}
Printed on serial from the ESP8266
Topic homeassistant/status received 'offline' length 7
About to send message: {"command_topic":"test_switch/command/c1d9bca9ddfc4803be31d7920d57f91e","components":{"a2f9f04b8ea04993b7e0d71cb53162d6":{"platform":"switch","unique_id":"a2f9f04b8ea04993b7e0d71cb53162d6"}},"device":{"hw_version":"1","identifiers":"c1d9bca9ddfc4803be31d7920d57f91e","name":"Test Switch","serial_number":"c1d9bca9ddfc4803be31d7920d57f91e","sw_version":"1"},"origin":{"name":"Test Switch"},"state_topic":"test_switch/state/c1d9bca9ddfc4803be31d7920d57f91e"}
Successfully published? 1

...

Topic homeassistant/status received 'online' length 6
About to send message: {"command_topic":"test_switch/command/c1d9bca9ddfc4803be31d7920d57f91e","components":{"a2f9f04b8ea04993b7e0d71cb53162d6":{"platform":"switch","unique_id":"a2f9f04b8ea04993b7e0d71cb53162d6"}},"device":{"hw_version":"1","identifiers":"c1d9bca9ddfc4803be31d7920d57f91e","name":"Test Switch","serial_number":"c1d9bca9ddfc4803be31d7920d57f91e","sw_version":"1"},"origin":{"name":"Test Switch"},"state_topic":"test_switch/state/c1d9bca9ddfc4803be31d7920d57f91e"}
Successfully published? 1
A successful test!
One improvement to help us see what the ESP8266 is doing. I noticed when it started that it does not tell us which topic(s) it is subscribing to.
...

Reconnecting to MQTT at homeassistant.lan:1883
MQTT connected? 1 Code 0
MQTT subscribed? 1
...
We can modify the MQTT subscribe function slightly to give us that information.
// subscribe the MQTT client to the given topic
void subscribe_mqtt_topic(const char* topic) {
    Serial.print("Topic ");
    Serial.print(topic);
    Serial.print(": ");
    bool subscribed = client.subscribe(topic);
    Serial.print("MQTT subscribed? ");
    Serial.println(subscribed);
}With the foundation we have put in place, this should now be relatively straightforward. Looking back on how we issued discovery messages in response to the Home Assistant status messages, the outline of the changes needed to action commands is the same
Of course the details of the command handler will differ from those of the status handler, because it must switch our device on and off rather than sending an MQTT message.
So, to subscribe to the command topic, we go to the bottom of the
ensure_mqtt_connected function where we left a TODO
// Retries connecting to the MQTT broker until
// the MQTT client indicates that it is connected
void ensure_mqtt_connected() {
  while (!client.connected()) {
    // ...
    client.setCallback(callback);
    subscribe_mqtt_topic("homeassistant/status");
    subscribe_mqtt_topic("test_switch/command/c1d9bca9ddfc4803be31d7920d57f91e");
  }
}
Then to route messages received on this topic we add a new
if to the dispatch_received_message function
(we left a TODO here also)
// Invokes the appropriate handler for the message depending upon the topic
void dispatch_received_message(const char* topic) {
  if (
    strings_are_equal(
      topic,
      length_of(topic),
      "homeassistant/status",
      21
    )
  ) {
    handle_homeassistant_status_message();
    return;
  }
  if (
    strings_are_equal(
      topic,
      length_of(topic),
      "test_switch/command/c1d9bca9ddfc4803be31d7920d57f91e",
      53
    )
  ) {
    handle_command_message();
    return;
  }
}
Of course we will need to create the handle_command_message function for this code now to compile, but we won’t implement it yet. We’ll just print something to serial so we know when it is invoked.
void handle_command_message() {
  Serial.println("Handling command message...");
  // TODO: switch device on or off
}
Now we’re in a good place to test this new code, to make sure we’re receiving the command messages in the right way, before we try to use them to actually do any switching. What should we expect then with these new code changes?
On startup…
MQTT connected? 1 Code 0
Topic homeassistant/status: MQTT subscribed? 1
Topic test_switch/command/c1d9bca9ddfc4803be31d7920d57f91e: MQTT subscribed? 1
...
Great start, then interacting with the switch in Home Assistant
Topic test_switch/command/c1d9bca9ddfc4803be31d7920d57f91e received 'ON' length 2
Handling command message...
As we expected!
The default commands for a switch like this are just the strings
ON and `OFF, as documented
on the switch configuration page.
Let’s assume we are switching GPIO2, the only one available on the simple ESP8266 boards with 8 header pins (we’ll need GPIO0 available for programming). Note that, if you use this pin “naively” it will flicker on during startup, so it’s necessary to add some compensation for this in the circuit (e.g. a capacitor), but that’s out of the scope of what we’re discussing here.
To make the switch respond to these commands then
void handle_command_message() {
  Serial.println("Handling command message...");
  // NOTE: the stored_message_length does not account
  // for the null terminator
  if (
    strings_are_equal(
      incoming_message,
      stored_message_length + 1,
      "ON",
      3
    )
  ) {
    digitalWrite(2, HIGH);
    Serial.println("Turned ON");
    return;
  }
  if (
    strings_are_equal(
      incoming_message,
      stored_message_length + 1,
      "OFF",
      4
    )
  ) {
    digitalWrite(2, LOW);
    Serial.println("Turned OFF");
    return;
  }
}
We can test this code first by directly publishing commands using
mqttx
mqttx \
  pub \
  -t 'test_switch/command/c1d9bca9ddfc4803be31d7920d57f91e' \
  -m 'ON' \
  -h homeassistant.lan \
  -p 1883 \
  -u $MQTT_USER \
  -P $MQTT_PASSWORD
mqttx \
pub \
-t 'test_switch/command/c1d9bca9ddfc4803be31d7920d57f91e' \
-m 'OFF' \
-h homeassistant.lan \
-p 1883 \
-u $MQTT_USER \
-P $MQTT_PASSWORDAfter a couple of tests with this not working, I remembered that I missed something critical in the setup code
// Set up the serial output and wifi connection
void setup() {
  pinMode(2, OUTPUT);
  // ...
Of course we must set the pin as an output before we try to switch it
on or off! With this fixed, sending the ON message will
cause the LED to light and we will see in the serial output
Topic test_switch/command/c1d9bca9ddfc4803be31d7920d57f91e received 'ON' length 2
Handling command message...
Turned ON
While sending the OFF message will cause the LED not to
light and we will see in the serial output
Topic test_switch/command/c1d9bca9ddfc4803be31d7920d57f91e received 'OFF' length 3
Handling command message...
Turned OFFThe reason that we really had to use mqttx to test in
the previous section was that, because Home Assistant does not yet know
about the actual state of the switch, it can only ever send the ON
command from the unknown state. To get the switch out of the unknown
state in Home Assistant we must report the device state to Home
Assistant. Fortunately, we already have all the tools we need at our
disposal to do this, so we just need to insert a couple of function
calls.
Recall from the device discovery payload that the state topic was
specified as
test_switch/state/c1d9bca9ddfc4803be31d7920d57f91e. Once
again from the switch
configuration documentation page we’ll see that the state messages
for on and off are exactly the same as the command messages
(i.e. ON and OFF).
The only change we need then to close the loop and report the state back to Home Assistant is
void handle_command_message() {
  Serial.println("Handling command message...");
  // NOTE: the stored_message_length does not account
  // for the null terminator
  if (
    strings_are_equal(
      incoming_message,
      stored_message_length + 1,
      "ON",
      3
    )
  ) {
    digitalWrite(2, HIGH);
    Serial.println("Turned ON");
    send_mqtt_message( // <---- this function call
      "test_switch/state/c1d9bca9ddfc4803be31d7920d57f91e",
      "ON"
    );
    return;
  }
  if (
    strings_are_equal(
      incoming_message,
      stored_message_length + 1,
      "OFF",
      4
    )
  ) {
    digitalWrite(2, LOW);
    Serial.println("Turned OFF");
    send_mqtt_message( // <---- and this function call
      "test_switch/state/c1d9bca9ddfc4803be31d7920d57f91e",
      "OFF"
    );
    return;
  }
}
Now we can press the switch button in Home Assistant in the unknown
state and see it turn to the On state, plus listening with
mqttx we see the state message
topic: test_switch/command/c1d9bca9ddfc4803be31d7920d57f91e, qos: 0
ON

topic: test_switch/state/c1d9bca9ddfc4803be31d7920d57f91e, qos: 0
ON
Plus we see in the serial output the message being sent
Topic test_switch/command/c1d9bca9ddfc4803be31d7920d57f91e received 'ON' length 2
Handling command message...
Turned ON
About to send message: ON
Successfully published? 1
Toggling again the button in Home Assistant we see the same for Off
topic: test_switch/command/c1d9bca9ddfc4803be31d7920d57f91e, qos: 0
OFF

topic: test_switch/state/c1d9bca9ddfc4803be31d7920d57f91e, qos: 0
OFF
and in the serial output also
Topic test_switch/command/c1d9bca9ddfc4803be31d7920d57f91e received 'OFF' length 3
Handling command message...
Turned OFF
About to send message: OFF
Successfully published? 1
There’s only one rough edge, which is a pretty small one, but it’s easily fixed - when the device is initially discovered by Home Assistant it shows in the unknown state, but of course we know (and one would expect) that the device would start in the off state. So we should announce that state on startup
// Set up the serial output and wifi connection
void setup() {
  // ...
  send_mqtt_message(discovery_topic, discovery_message);
  send_mqtt_message(
    "test_switch/state/c1d9bca9ddfc4803be31d7920d57f91e",
    "OFF"
  );
}